

Information - Pressure tanks - hydrophore tanks
Installation of pressure tank
Installation of pressure tank
Author: Akvedukts
In water supply systems, the pressure tank (hydr oaccumulator, hydrophore tank, bladder vessel) is used to equalize pressure, prevent hydraulic shock, ensure uninterrupted operation of pumps. Read more about pressure tanks, their different names and types in this article. For complete information about the pressure tank, read instruction manual.
Installation of the pressure tank depends on its design, parameters of the pump of water system and hydraulic parameters of the system itself. Below there are examples of pressure tank installation in different situations.
Pressure tank installation cases
 |
 |
 |
|
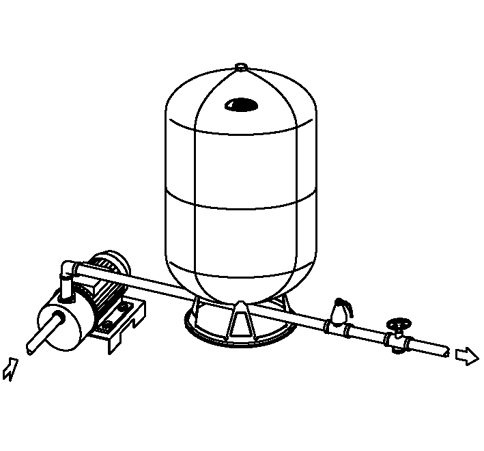
Water supply system with a "dry" pump, vertical pressure tank with support leg integrated into the pipe line |
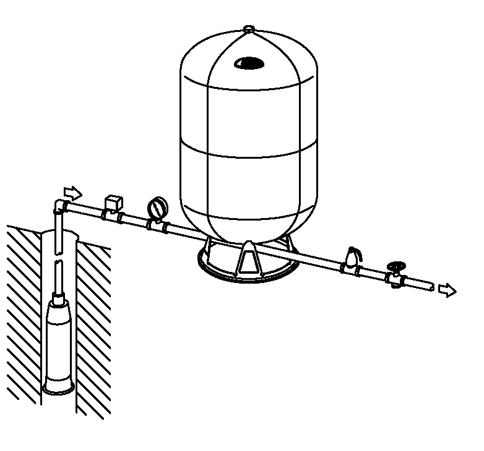
Water supply system with submersible (borehole) pump, vertical pressure tank with support leg integrated in pipeline |
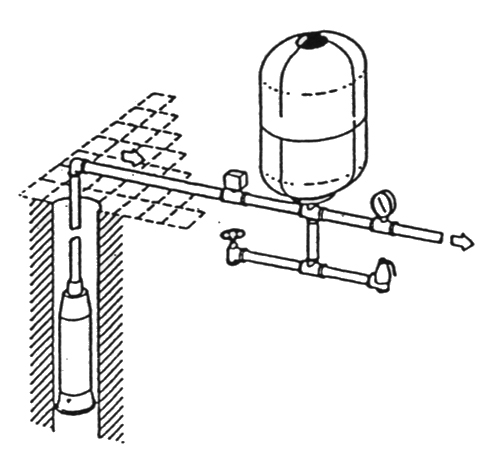
Water supply system with submersible (borehole) pump, vertical pressure tank without support or brackets, in-line |
 |
 |
|
|
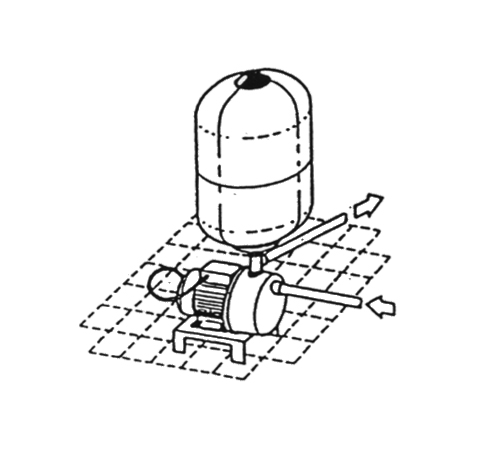
Water supply system with a "dry" pump, vertical pressure tank without support or brackets, mounted at the pump outlet |
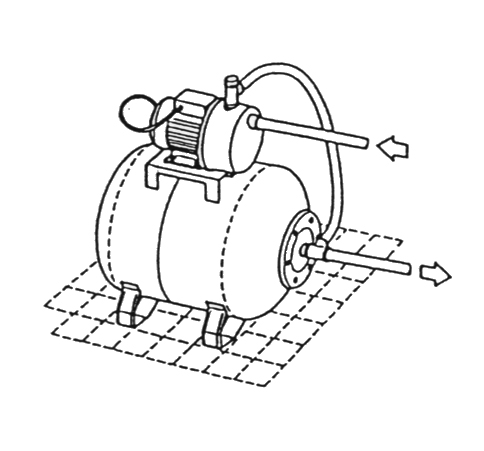
Water booster set, horizontal pressure tank, connected to the pump outlet and used as a pump shelf |
Installation of the pressure tank
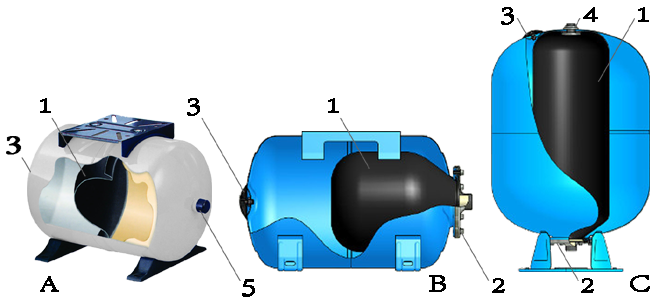
Pressure tanks may have different designs, but their basic equipment is the same - the connection to the water supply (2, 5) and the pre-charge air valve (3), closed with protection cap. Diaphragms / membranes and their place of attachment in the pressure tanks differs in different types of tanks - read more about membranes here.
The pressure tank can be installed at any point in the water system on the pressure line, as hydraulically the system is uniform, and it does not matter whether the pressure tank is located closer or farther away from the water pump. The location of the pressure tank should preferably be such that a pressure switch or other pressure measuring device can be installed near of it. The painted steel pressure tank should be installed in a dry room where no condensation can form and no temperature fluctuations below 0°C are possible. For humid rooms, it is better to choose a pressure tank made of stainless steel or composite material.
Installation steps:
1) If the pressure tank is being installed in an existing system, make sure the pump control panel is turned off and that the system at the pressure tank location is completely empty.
2) If a hydrodynamic tank without a diaphragm / membrane should be replaced in the existing system, disconnect the air supply devices, level sensor, and other equipment that will not be needed in the future.
3) Take the new pressure tank out of the packaging, remove the protective cap from the air valve.
4) Check the air pre-charge pressure in the pressure tank with an air pressure gauge; it should match the pre-charge pressure value indicated on the tank's data plate.
5) If the factory set pre-charge pressure does not match that required in the water system, increase it using a bicycle or car tire pump, or reduce it to the required value by draining the excess air pressure through the air valve.
6) Connect the pressure tank to the main water supply or to the pump output, observing all installation rules.
7) It is recommended to install a safety valve and set it to the maximum working pressure of the system.
7') For pressure tanks with double-sided diaphragm mounting, the safety valve and pressure gauge may be installed in the threaded bulk head fitting (tank C, item 4). If the equipment is installed elsewhere, the bulk head fitting must be closed with a plug (3/4" thread).
8) When the pressure tank installation is complete, connect power to the pump control panel.
9) Turn on the pump and fill the system with water until the pressure switch trips and the pump shuts off.
10) If air has accumulated in the system, bleed it out by repeatedly opening and closing the farthest tap on the water system from the pressure tank.
11) Open one or more taps to drain water from the pressure tank and check that the pump is running properly. If there is a pause between emptying the tank and starting the pump, it is possible:
- the ON pressure set on the pressure switch is lower than required (use the pressure switch manufacturer's instructions to adjust it);
- the pre-charge pressure in the pressure tank is higher than necessary – it should be 0.2 bar lower than the switch-on pressure of the pump.
12) Make the necessary adjustments and repeat steps 8 - 10 until a pause is not detected.
13) Check all connections for leaks and make sure no water is leaking from them.
14) The system is ready for use if all of the above items have been completed successfully.
15) Check the pre-charge pressure in the pressure tank on a regular basis.